





How to Change Oil in Your Car: Step-by-Step Guide
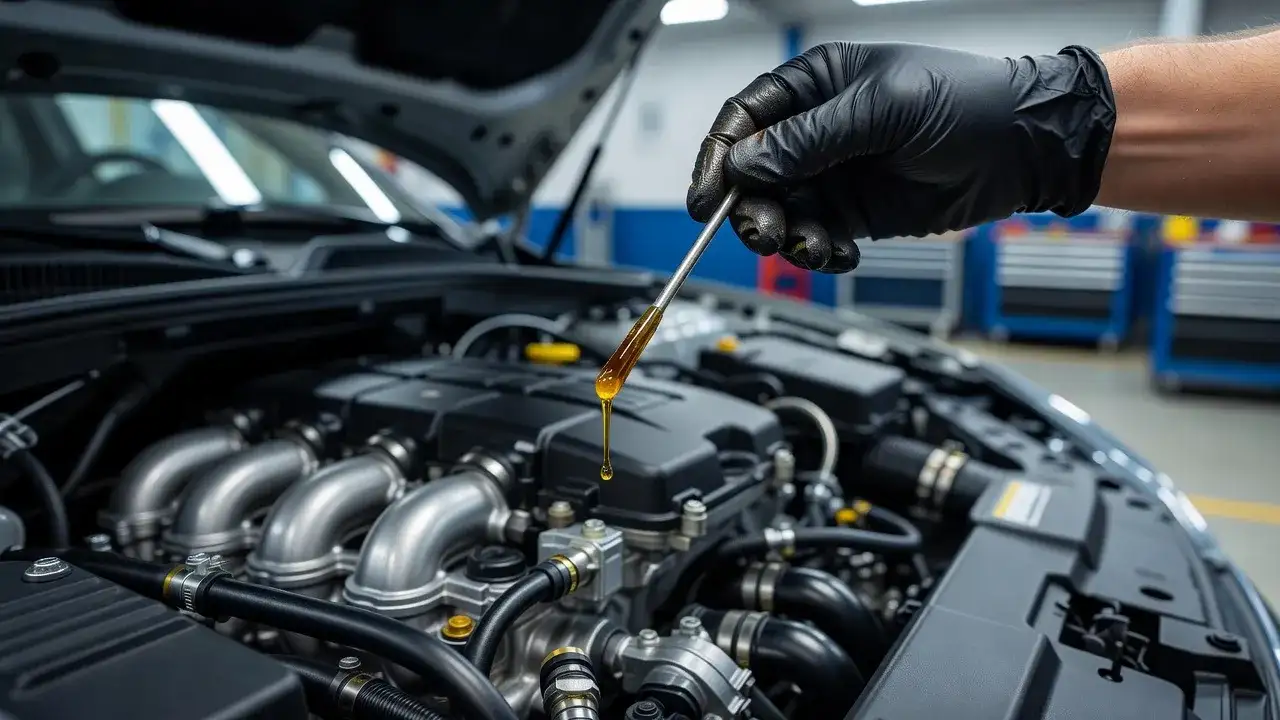
To change oil in your car, warm the engine briefly, drain the old oil by removing the drain plug, replace the oil filter, reinstall the drain plug, and add fresh oil through the fill cap. The full process takes about 30 to 45 minutes and can save you $50-$100 per visit compared to a shop.
Why Changing Your Own Oil Is Worth It
Oil is your engine’s lifeline. It reduces friction between moving metal parts, keeps the engine cool, and flushes out microscopic debris. When oil breaks down, your engine wears faster and repair bills follow.
Changing your own oil gives you three real advantages:
- Cost savings: A DIY oil change costs $25 to $45 in materials vs. $70-$150 at a shop or dealership.
- Quality control: You choose the oil grade and brand that best fits your car.
- Early detection: Getting under your car regularly helps you spot leaks, worn parts, or other issues before they become expensive.
If you’re wondering how to change oil in car safely at home, the process is simpler than most drivers expect and requires only a few basic tools.
What You’ll Need Before You Start

Gather everything before you begin, stopping mid-job for a missing tool wastes time and can be messy.
| Item | Why You Need It |
|---|---|
| Fresh engine oil (correct grade) | Replaces the old, degraded oil |
| New oil filter | Traps contaminants; should be replaced every change |
| Oil drain pan | Catches the old oil underneath |
| Socket wrench + correct socket | Removes the drain plug |
| Oil filter wrench | Helps loosen a tight filter |
| Car jack + jack stands | Lifts the car safely for access |
| Funnel | Prevents spills when adding new oil |
| Disposable gloves + rags | Protects your hands; keeps your workspace clean |
| Wheel chocks (optional but recommended) | Prevents the car from rolling |
Before you begin learning how to change car oil, make sure you have the correct oil grade and replacement filter for your vehicle.
Pro Tip: Check your owner’s manual for the exact oil grade (e.g., 5W-30, 0W-20) and the filter part number before buying supplies. Using the wrong spec can void your warranty or reduce engine protection.
How Often to Change Oil in Car

One of the most searched questions are: when to change oil in the car or how often to change oil in car? The answer has changed significantly over the last decade.
| Oil Type | Recommended Interval |
|---|---|
| Conventional oil | Every 3,000 to 5,000 miles |
| Full synthetic oil | Every 7,500 to 10,000 miles |
| Synthetic blend | Every 5,000 to 7,500 miles |
| High-mileage oil (75k+ miles) | Every 5,000 to 7,500 miles |
General rule for modern cars: Most vehicles made after 2010 using full synthetic oil can go 7,500 to 10,000 miles between changes. Some newer models with advanced engines (like the Honda Fit or certain BMW models) can stretch to 15,000 miles.
Don’t rely on the old “every 3,000 miles” rule. It applies mainly to older vehicles or severe driving conditions (extreme heat, frequent towing, lots of short trips in stop-and-go traffic).
Always check your dashboard’s oil life monitor if your car has one. It’s smarter than any calendar since it calculates change intervals based on your actual driving patterns.
Step-by-Step: How to Change Oil in Car
The following guide explains how to change oil in car correctly, even if this is your first DIY maintenance project.
Step 1: Warm Up the Engine (2 to 3 Minutes)
Run the engine for 2 to 3 minutes. Warm oil flows out faster and carries more debris with it. Do not run the engine until fully hot because hot oil can burn you badly.
Step 2: Lift and Secure the Car
Park on a flat, level surface. Engage the parking brake. Use a floor jack to lift the front of the car and place jack stands under the frame. Never work under a car supported only by a jack.
Step 3: Locate and Remove the Drain Plug
Slide under the car and find the oil drain plug on the oil pan (usually toward the bottom-center of the engine). Place your drain pan underneath. Use a socket wrench to loosen the plug counterclockwise, then remove it by hand. Let the oil drain completely, this usually takes 5-10 minutes.
Step 4: Remove and Replace the Oil Filter
While the oil drains, locate the oil filter (cylindrical, about the size of a large can). Use an oil filter wrench to loosen it counterclockwise. Be ready because it may have residual oil.
Before screwing in the new filter, dab a small amount of fresh oil on the rubber gasket of the new filter. This ensures a proper seal and makes future removal easier. Tighten by hand until snug but remember do not overtighten it.
Step 5: Reinstall the Drain Plug
Once the oil has fully drained, wipe the drain plug and its seat clean. Reinstall the plug and tighten firmly with the socket wrench. Do not strip the threads, do it firmly but not forcefully.
Step 6: Add Fresh Oil
Open the hood and locate the oil fill cap (usually marked with an oil can icon). Insert the funnel and add the recommended amount of oil. Most 4-cylinder engines take 4–5 quarts; V6 engines typically take 5–6 quarts. Check your owner’s manual.
Step 7: Check for Leaks
Start the engine and let it idle for 60 seconds. Check under the car and around the filter for any drips.
Step 8: Check the Oil Level
Turn off the engine. Wait 2 minutes. Pull out the dipstick, wipe it clean, reinsert fully, then pull it out again. The oil level should sit between the two marks. Top off if needed.
Once you’ve completed these checks, you’ve successfully learned how to change car oil and can confidently perform future oil changes yourself.
Step 9: Reset the Oil Life Monitor
If your car has a digital oil life monitor, reset it per your owner’s manual. On most GM vehicles, turn the ignition on (don’t start), press the accelerator to the floor three times within five seconds. Many different cars have their own reset methods, check your manual first.
Troubleshooting & Common Mistakes
Even with careful prep, DIY oil changes occasionally go sideways. Here’s how to handle the most common issues.
Drain plug is stripped or won’t tighten
If the plug spins freely without tightening (rounded threads) or the oil pan threads feel loose, stop immediately, don’t keep forcing it. A self-tapping oversized drain plug or a thread repair kit (helicoil-style insert) can fix minor stripping. For more severe damage, the oil pan may need professional repair or replacement. Driving with a stripped plug risks sudden oil loss and engine damage.
Oil filter won’t budge
If the filter wrench slips or the filter won’t loosen, try these in order: switch to a different style of filter wrench (band, claw, or socket-cap types grip differently), wrap a rubber strap or bungee cord around the filter for extra grip, or apply a penetrating lubricant and wait 5-10 minutes. As a last resort, a screwdriver punched through the old filter housing (sideways, not into the engine) can give you leverage to turn it; just discard the filter afterward since it’s being replaced anyway.
You overfilled the oil
If the dipstick reads above the top mark, you have too much oil, which can cause foaming, leaks, or seal damage. The easiest fix is using a turkey baster or hand-operated oil extractor pump through the dipstick tube to remove the excess. Alternatively, you can drain a small amount through the drain plug into your pan, then recheck the level. Don’t drive until the level is corrected.
You underfilled or forgot to check the level
If the engine light comes on or you hear ticking shortly after a change, check the dipstick immediately. Low oil can starve the engine of lubrication within minutes. Top off with the same oil type used during the change.
Oil leaking after the change
A drip right after refilling is usually from a loose drain plug, a filter that wasn’t seated properly, or oil spilled during the fill that’s now running off. Tighten the plug and filter by hand-snug plus a quarter turn (don’t overtighten), wipe down the area, and run the engine again to recheck. Persistent leaks after this point may indicate a cracked filter housing or damaged oil pan gasket, which need professional attention.
You forgot to reinstall the drain plug
This is the most catastrophic and most common DIY mistake; oil drains out almost immediately once the engine runs, leading to severe engine damage within seconds to minutes. Always do a final visual check under the car before starting the engine, and consider a simple checklist taped to your garage wall.
Wrong oil grade used
If you’ve already added the wrong viscosity oil, it’s not necessarily an emergency for a single short drive, but it should be drained and replaced with the correct grade as soon as possible. Continuous use of the wrong oil grade can affect fuel economy and long-term engine wear.
How to Choose the Right Oil for Your Car
Learning how to change motor oil in car is only half the job because picking the right oil matters just as much.
Viscosity grades (like 5W-30 or 0W-20) tell you how the oil behaves in cold and hot conditions. The number before “W” (winter) indicates cold-start flow; the number after indicates high-temperature performance.
For most U.S. drivers:
- 5W-30 remains the most common for older conventional vehicles
- 0W-20 is standard for many newer Toyotas, Hondas, and Fords
- 5W-40 is often used for European makes like BMW, Audi, and Mercedes
If your car has over 75,000 miles, consider a high-mileage oil. These types of oil are formulated with seal conditioners that reduce minor leaks and oil burning common in older engines.
For trusted guidance on oil specifications by vehicle, the American Petroleum Institute (API) maintains a searchable database that confirms oil certification for your vehicle’s requirements.
What Your Oil Color Is Actually Telling You
Most articles tell you to “check the oil.” Few explain what you’re actually looking for. Here’s what the color of your oil on the dipstick reveals:
| Oil Color | What It Means | Action |
|---|---|---|
| Amber / Light tan | Fresh, healthy oil | No action needed |
| Dark brown | Heavily contaminated, noisy exhaust pipe | Change immediately |
| Milky / creamy white | Water or coolant contamination | Stop driving, possible head gasket issue |
| Foamy / frothy | Air mixing in overfilled or leak | Check level; consult a mechanic |
| Metallic glitter | Metal shavings present | Stop driving, may have internal engine damage |
Milky or metallic-glitter oil are serious warning signs. Do not simply change the oil and drive on. Get your engine inspected.
EV & Hybrid Owners: What’s Different for You
With over 4 million EVs now on U.S. roads and plug-in hybrid cars are present. One must understand whether oil change is required in EV or not?
Pure EVs (Tesla, Rivian, Chevy Equinox EV, etc.): No engine oil needed. EVs use electric motors with sealed drivetrains. However, you need to maintain:
- Brake fluid (every 2 years)
- Coolant for the battery thermal system (every 5 years or per manual)
- Gear oil in the drive unit (check your manual for Tesla type cars, for example, says lifetime fluid in most models, but some older Model S units recommend checks at 100k miles)
Plug-in Hybrids EVs still have combustion engines, and they still need oil changes. However, the interval is often shorter, not longer. Why? In electric-dominant driving, the gas engine runs infrequently, which means it doesn’t fully heat up. This causes fuel dilution in the oil.
Standard Hybrids follow the same schedule as their gas counterparts, since the engine runs regularly.
If you drive a PHEV primarily on electricity, set a calendar reminder because your oil may look fine while being chemically compromised.
How to Dispose of Used Oil the Right Way
Used motor oil is toxic and cannot go in the trash or down the drain. Here’s how to handle it:
- Pour the used oil into a sealed container. The jug your new oil came in works perfectly.
- You may take the used oil to any AutoZone, O’Reilly Auto Parts, Advance Auto Parts, or Walmart Auto Center because all accept used oil for free.
- You can also find a local recycling drop-off.
One gallon of used oil, if recycled properly, can produce 2.5 quarts of re-refined motor oil that performs just as well as virgin oil, so recycling it genuinely matters.
The Final Story Behind Oil Change
Knowing how to change oil in car is one of the most valuable skills any driver can have. It keeps your engine running longer, saves you real money, and puts you in the driver’s seat.
The entire process takes under an hour the first time, and under 30 minutes once you’ve done it twice. Start with the right oil for your car, follow the steps above, and don’t skip the dipstick check at the end.
And if you drive a PHEV (Plug-in Hybrid Electric Vehicle) don’t forget to set that calendar reminder. Your oil life monitor may not know your gas engine barely ran last month.
GET AN OIL CHANGE NEAR Lagrange, GA
FAQs
What are the steps to change oil in a car?
The steps to change oil in a car are: (1) warm the engine briefly, (2) lift and secure the car on jack stands, (3) drain the old oil by removing the drain plug, (4) replace the oil filter, (5) reinstall the drain plug, (6) add fresh oil through the fill cap, (7) run the engine briefly to check for leaks, and (8) verify the oil level with the dipstick.
What engine oil for a Chevrolet?
Most modern Chevrolet vehicles (Silverado, Malibu, Equinox, Traverse) use 5W-30 or 0W-20 full synthetic oil meeting the GM dexos1® Gen 3 standard. Always verify the exact spec on the oil fill cap or in your owner’s manual, as it varies by engine. For example, the 2.7L turbo in the Silverado calls for 0W-20 dexos1, while older V8 engines typically use 5W-30.
Can I change my car’s oil myself?
Yes, absolutely. Changing your own oil is one of the most beginner-friendly car maintenance tasks. You need basic tools (a socket wrench, oil drain pan, and filter wrench), and the correct oil and filter for your vehicle. The main risk is forgetting to reinstall the drain plug or overtightening the filter.
How often to change oil in the car?
Change your car’s oil based on mileage and oil type: every 3,000–5,000 miles for conventional oil, and every 7,500–10,000 miles for full synthetic. If your car has an oil life monitor, follow its guidance since it’s calibrated to your actual driving. At minimum, change oil at least once per year even if you haven’t hit the mileage threshold, since oil degrades over time even when sitting.
How to change car oil at home?
To change car oil, start by warming the engine for a few minutes, then safely lift the vehicle and drain the old oil. Replace the oil filter, reinstall the drain plug, add the correct amount of fresh oil, and verify the level using the dipstick. Most DIY oil changes take about 30–45 minutes.
Is learning how to change car oil worth it?
Yes. Learning how to change car oil can save money on maintenance, help you choose the best oil for your vehicle, and allow you to inspect your car for leaks or worn components during routine service. Many drivers save $50–$100 per oil change by doing it themselves.

0 comment(s) so far on How to Change Oil in Your Car: Step-by-Step Guide